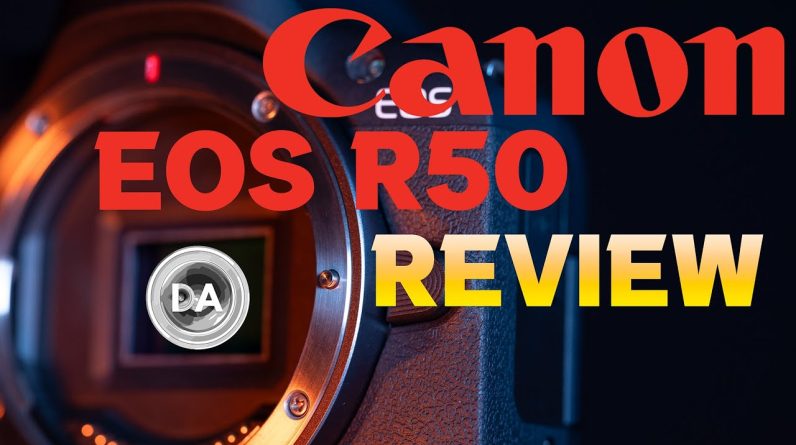
The Canon R50 is an amazing camera for Beginners and people simply new to Cameras but chances are if you're one of Those people you don't really know how To get the most out of this camera in This video I'm going to turn you into an Absolute camera ninja by showing you the Very specific settings that you need to Dial in to get the best possible photos In the best possible video from your Canon R50 also if you are new to cameras There's an absolutely 100 free guide on How to dramatically improve your photos And videos in the description down below That will improve your photos and videos All within a day so first up you have The shutter button right up here at the Top this will take your photos and then Right next to that you have an ISO Button this is for changing the Sensitivity of your sensor and I will Explain what exactly that does later in The video and next to that you have this Tiny little button with a red dot on it This is specifically for starting video Record and of course you have your on And off switch but the most important Thing to look at is your mode dial right Up here at the top you'll see your mode Dial and this is for changing the mode That your camera is currently shooting In right now we have it set to M this is Manual photo mode if we flip it over to This little camera icon with the two
Legs this is for video record mode and There's also this green icon here this Is for automatic photo shooting and Video shooting now this is really Important because While most cameras Aren't that great in automatic mode the Canon R50 is an exception and there's Actually a few really important Automatic modes that we have to look at Next up let's look at the back of the Camera so right here on the back of the Camera you have a bunch of buttons but Most of them you can actually ignore the Main ones to know is one the info button This will change the amount of Information displayed on your back Screen I personally like to keep it Really minimal but depending on how you Like to shoot you can have a lot of Information on here or just a little bit Next to that you have your menu button For accessing your menus which we'll go Into later on you have your play button For accessing whatever you've shot on This camera and this button right here Can actually click up down left and Right for changing settings but also it Can help you access different settings By hitting left you'll actually access Autofocus hitting right you'll access What speed of photos you want to take Next up let me show you how to adjust The exposure on your camera now right Here at the bottom you'll see shutter
And aperture which are two of the major Settings and there's one way to change Shutter which is actually to Scroll this wheel right up here at the Top depending on which direction you Scroll to it will either go up or down Or you can simply tap this and scroll Like that second you have your aperture You can once again click your aperture And go left to right or the other thing You can do is you can actually hit this Button up here at the top and you'll Notice it'll switch between shutter and Aperture and you can use this command Wheel at the top to change your aperture So let me show you how to work this back Screen over here so if you hit the Q Button up here you'll actually get Access to a lot of your major settings The first one is autofocus area this is Going to determine how much of the Camera is able to see for your autofocus The first option which is spot this is Going to give you just one simple little Box in the middle of your image area you Can actually move it around by using the Touchscreen and this way only that Little box will have whatever it needs To be in Focus this is really helpful For shooting portraits or where you know You're shooting something where the Autofocus always needs to be in that one Specific area or you can also use whole Area autofocus this is going to give you
Access to your entire image area and This is where the camera will determine What needs to be in focus by looking at The whole image area this is good for Landscapes or group shots and underneath Autofocus area you also have autofocus Operation now one shot will give you Autofocus in just one specific area but It will also not change autofocus Between taking photos then there's AI Autofocus when basically the camera will Figure out what autofocus mode it needs To be in this is the mode that I Recommend most people leave it in and Then there's also Servo now Servo is Important if you're shooting something That's always moving around then you can Just leave it in Servo and the camera Will always be tracking the moving Subject and underneath that you'll also See subject detect now this is going to Give you subject attack for people Animals or Vehicles this is really Important when you're shooting one Specific type of subject matter like People animals vehicles and the camera Will basically ignore anything else Besides that specific subject this is Really useful if you're shooting a car In a crowded room with a bunch of people Walking around for shooting your pet and You want to make sure the camera only Focuses on your pet but finally let's Talk about how to get the best possible
Photo quality from your camera so going Back into your quick menu you'll see a Little L icon if you click into it You'll see a bunch of options here now This is for JPEG and you can pick a Bunch of different sizes I always Recommend shooting L with a little curve Next to it this is going to give you the Best quality jpegs and if you do want to Shoot raw you simply want to hit this Little info button right here and you Can choose raw or compressor row now Compress raw is going to give you a Smaller raw file but it's going to be More work for your computer to unpack That file later on but for most people I Recommend just shooting regular raw and The compress raw and regular raw pretty Much have the same image quality now There's two settings that people often Mess up and it completely ruins their Images so let me show you how to fix That so going back into your quick menu Right here at the top you'll see AWB This is your automatic white balance or You can also choose different white Balances for most people I recommend Just simply leaving it on auto white Balance this is where the camera is Going to determine what kind of lighting You're shooting in and what to set the White point at but if you know you're Shooting in Sunny Shade stuff like that Then you can go ahead and pick a manual
White balance the second thing you need To look at is what picture profile You're shooting in so you want to go Back into your quick menu and hit this Little s icon right here this will open Up a bunch of different picture Styles Now you have a whole bunch of to choose From for most people you can simply Shoot in standard and you'll get regular Colors but if you know you want to do Something with it later on especially For shooting jpegs you can also choose Portrait landscape fine detail neutral Neutral is going to give you a very flat Image that you'll have more room to play Around with the colors but if you're Going to do that for photos you might as Well shoot raw and another picture Profile to shoot on is called monochrome Monochrome is going to give you black And white images and believe it or not Despite black and white not being So Glamorous black and white can give you a Really cool effect to your photos if you Remember earlier in this video I Mentioned something called ISO which is The sensitivity of your sensor now the Sensitivity of your sensor is going to Determine two things how bright your Image is but also how clean your image Is without a bunch of grain or noise so The way to change ISO is two ways one You can hit the iso button at the top You'll actually get your ISO to pop up
And you can either use your fingers or You can use this little click wheel in The back to change your ISO for ISO on The Canon R50 I recommend shooting Somewhere between 400 to 1000 for the Best image quality if you shoot higher Than that you should only be using it For low light situations and if you Shoot high as 3200 or 6400 you will get A little bit of grain in your images but I don't recommend shooting higher than 6400 another thing that's really Important when it comes to taking photos Is what frame rates or how many frames Per second you're shooting your photos So in order to access that menu you Simply want to go back to your main menu Hit this right right here on the back Scroll wheel and you'll get a bunch of Modes to come up single shooting is Where it simply takes one photo then Stops a high speed continue shooting is Where it shoots as high as it possibly Can for this camera it's 15 frames per Second or you can shoot in high speed Continuous which is closer to 12 frames Per second and low speed continuous is Closer to six or seven frames per second And you also have a self timer where you Can set 10 seconds two seconds or you Can set a self timer with continuous Photos this is a mode that I don't Recommend most people use I recommend Simply shooting in either low speed
Continuous or high speed continuous this Is going to allow you to Simply hold Down the shutter button and get a Continuous burst of photos and then pick The exact photo that you want for most People if you're shooting portraits you Simply want to shoot in single shooting Mode this way your camera is taking one Photo and you're not getting a whole Bunch of this exact same photo in your Camera roll and this way you don't have To call through a bunch of photos that You really don't need Now setting your Exposure for your camera is going to be Different depending on what photo you're Shooting but the rule for most people is You never want to shoot lower than 1 Over 60 and if you're shooting something High moving you want to shoot something Closer to 1 over 25 or even one over 240 So you don't get a lot of motion blur But if you don't know exactly how to Expose for your camera and you're pretty New to using cameras and you want to Learn how to take your photos and videos To a new level make sure to check out The 100 free training in the description Down below it will give you dramatically Better photos and videos in less than a Day so based on that if you follow all Of those steps shoot in fine or raw in Terms of image quality set your Autofocus up properly make sure your White balance is correct and you also
Want to make sure you have the correct Exposure you should get the best Possible image quality from this camera But for the Canon R50 Canon has actually Included a ton of automatic modes for Shooting photos that dramatically Improve your photo quality but also give You a really easy time when it comes Back actually getting these photos so For that you want to go to the top of Your camera and you want to flip over to This green icon which is automatic so Now in automatic mode you'll actually Notice the screen on the back has Dramatically changed so the first thing You want to do is you want to click this Icon right above this one at the bottom And this will give you three different Automatic creative modes the one we're Going to look at first is Advance which Is automatic plus you want to click into That in automatic plus mode the camera Actually does everything for you when You take one photo it actually takes Multiple photos at the same time Combines them all into a really good Looking image taking all the light data The shadow data and combining it into an HDR photo this is pretty much the Easiest way to get great photos out of This but the one downside is that you Can no longer shoot Raw photos so for Someone that wants to edit your photos Later on this is not the mode to do it
The mode that I recommend most people Shoot in is called creative assist this Is going to give you a lot of control Over your image while still using the Automatic features of this camera so Once you click into that you'll get a Slightly different looking screen but if You tap this icon right here you'll Notice that you can also shoot raw in This mode so you want to make sure it's Set to raw and then if you hit this Button right here at the bottom you'll Get a new menu coming up that's going to Determine how your image actually looks With presets if you click into that You'll get a whole bunch of color Filters on top of your image so this is Going to help you get a better looking Image by adding a color preset for me I Really like Vivid and on top of that You'll also be able to choose how much Background blur you want you can simply Go into that and choose whether you want It blurred or you want it really really Sharp and if you click into that again You also get a brightness setting a Contrast setting a saturation setting Color tone and you can even shoot in Monochrome this is going to basically Allow you to tell the camera what kind Of photo you want and the camera is Going to do all the technical settings That we talked about earlier for you the Third and last automatic mode is called
Creative bracketing so to access this You want to go back into your camera hit This icon at the top go to the middle Icon which is called created bracketing And in this mode you can actually take One photo but your camera will actually Spit out three different edits of that Exact same photo with different color Tones different color grading different Presets and this is going to make your Life a lot easier by giving you multiple Edits of the same photo and you can Simply choose your favorite one chances Are a lot of you guys probably picked up This camera to get really Stellar video Out of it and while right out of the Camera the video does look pretty good If you really want to do something Special with these videos you have to Put in some really specific settings so Let's go back to our camera and you want To go to the mode dial here and you Simply want to click the little icon or Pick the little icon with the camera That has too little feet on it that's Right above M and once you're on the Back of the camera you'll notice your Menu settings your screen has changed a Little bit but once you hit the queue Icon again you'll see you have similar Settings but they're slightly different So you want to hit this icon right up Here at the top and you'll get a bunch Of different settings one is movie Auto
Exposure where basically the camera does All the exposure shutter ISO aperture For you can also shoot movie manual Exposure which is what I recommend most People use by tuning in your own Specific exposure for whatever you're Shooting you're going to get the best Quality image on top of that you also Have a demo for close-ups of products Basically you can hold up a product in Front of the camera and by doing this The autofocus will go to the product and When you put the product down the Autofocus won't go back to your face and Underneath that you'll also have movie Is mode this is for shooting stabilized Shots if you're shooting walk and talks This mode will basically make it so your Camera footage is always stable but Again you can actually set up your Stabilization in manual mode which is What I recommend most people shoot in And underneath that you have HDR video Now HDR video is going to give you Better colors but it's also going to Give you a very flat image like you will Have to color grade later on but for This tutorial we're going to shoot Everything in manual exposure so we have The most access over our settings once We're in manual exposure you want to hit The queue icon again and go down to Autofocus this once again is going to Give you either whole area autofocus or
Spot autofocus but the most important Thing is right here you'll see a little 4K icon and this way you can choose what Quality you want to shoot your videos in And you have a whole bunch of qualities But for most people I recommend shooting In 4k ipb or 4K ipb lite ipb light is Simply going to give you a smaller bit Rate for someone that's maybe shooting For social media or something that Doesn't require a lot of data in your Video and this will also save you a ton Of room on your camera But you'll also notice right next to the Resolution you'll also see your frame Rate now 29 frames per second is what I Recommend most YouTubers shoot at it's Going to give you a very like real-time Look to it but if you're shooting Something more cinematic you should Scroll down to 23.98 this is more of a Cinematic frame rate and it's closer to What movies are shot in if you keep Going you'll also see full HD which is 1920×1080 it's 60 frames per second this Is for slow motion where you can Actually slow down your camera by two Times speed to get a nice slow motion Effect for simple moments in your video You also get 29 frames per second and 23 Frames per second so depending on what You're shooting either shoot an ipv like For social media or standard ipb if You're planning on doing something more
Serious with your video though Canon R50 Also shoots at 120 frames per second for Five times slow motion and the way to do That is you actually have to hit the Menu button go into your main menu and Go down to high frame rate mode on the First page of the first little camera Icon here once you click into that it'll Actually ask you to enable it but the One thing to note is that it's going to Shoot in 100 120 frames per second and The footage is going to be automatically Slowed down for you in camera and this Mode also does not record audio another Thing to watch out for is your is mode Now is mode is going to determine how Smooth your footage looks with the Camera actually stabilizing your footage For most people I actually recommend Keeping it off because in is mode it Actually crops into your sensor slightly So your image view area is slightly less Wide but if you're going to be doing Walking and talking simply going to Digital is and turn is mode on now in Order to get the best quality colors for Your camera there's two settings that we Have to adjust the first thing you want To do is you want to hit menu again in The first little camera icon here on Page two you'll actually see something Called HDR shooting PQ you want to turn This on and this will give you an HDR Video you will get a flatter looking
Image but this is also going to give you 10 bit color and this is only Recommended for someone that wants to Color grade their video later on Otherwise I just recommend keeping this Off and just shooting in standard 8-bit Color and if if you are someone that's Mainly going to be shooting your camera In standard 8-bit color another thing That I do recommend doing is going back Into your quick menu here and clicking This little picture profile icon here And actually shooting in neutral and you Can even go hit this little info icon Right here and turn down the sharpness Turn down the contrast a little bit Saturation a little bit and I don't Recommend adjusting color tone at all But this will give you a slightly Flatter image so later on you can adjust Your saturation or contrast and even add Sharpness but this way you have a Flatter and more flexible image instead Of just getting getting all these Settings picked right into your image And with that you now know how to get The best possible quality photos and the Best possible quality videos from your Camera including how to set up your Autofocus modes how to set up your frame Rates and with this you're ready to Create whatever content you want and if You want to learn how to get better Photos and videos out of any camera you
Own and simply take the quality of your Photos and videos to a new level make Sure to check out the free course in the In the description down below which will Give you everything you need on how to Level up your photos and videos and I'll See you guys in the next video peace

