The Sony zve10 does not look great but It actually has a lot of potential if You set it up with the right settings And it's important to make sure you have The right settings dialed in for your Shooting scenario so in this video I'm Going to show you how to get the most Out of your Sony zve E10 with a quick Setup guide and how to dial in your Perfect settings for both photos and Cinematic video if you want the best Price on the zv10 make sure to check out The links in the description down below And alright guys let's get right into it Right up here at the top you'll see an On and off button and then below that is A bun to go between photo video and slow Motion mode the button with the red Circle is your video record mode and Then right up here at the top you'll see Another button this is your shutter Button for your photos next to it you'll See a zoom rocker for digital zoom and Clear image zoom and next to that is a Defocus button basically what it does is It opens up the aperture all the way Open so you get this nice Lorry Background and it'll adjust all the Other settings so that you can get a Properly exposed image next up let's Talk about the quick function menu so on The back of your camera you'll see a Button with FN once you click into that You'll have a quick menu pop-up at the
Bottom of your camera this is going to Allow you to change all of your major Settings on your camera and you can also Customize this quick menu to have the Exact settings that you want for this You want to go into menu go to the Second tab on the second last page go to Function menu set click into that and With this page you can easily take out Whatever settings you don't want or add Settings that you want next up let me Show you the different shooting modes on The camera so you can set this camera up For your exact shooting scenario for This you want to go back into your Function menu go into the bottom right Icon click into that and you'll see a Bunch of different shooting modes but There's only two that you really need to Care about one is automatic this is Where the camera does all the work for You it makes all the major decisions for You but I recommend shooting in manual Mode because in this mode you can choose Your shutter aperture and ISO to make Sure you get the Perfect Image also by By shooting in manual mode you also have Greater control over specific settings In the camera that help you get the best Colors from it and speaking of shutter Aperture and ISO let me quickly show you How to change those settings on this Camera for shutter you simply want to Rotate this scroll wheel on the back and
That's going to change your shutter Speed right here at the bottom for Aperture you want to turn this knob Right here this black unmarked knob this Will change your aperture in the back And your aperture will depend on what Kind of lens you have on this camera and For ISO you want to click right and here You can change your ISO easily so that's How you change the three major settings On this camera also if you really want To customize your camera you can also go Into the menus and choose different Custom buttons this is how you do it you Want to go back into your menu and on The exact same page we were on before There's also custom Keys once for photos One for video and right in here you can Actually customize every single button On the back of this camera so it does Exactly what you want and there's two Settings that I have to show you guys Because most people usually mess these Up including myself for this you want to Go back into your function menu and you Want to click over to AWB this is your White balance and you want to make sure It's set to the exact shooting scenario You're in it will give you options like Daylight shade cloudy incandescent Different lighting scenarios in this way The camera uses the right color Matrix To make sure that it's accurate to the Lighting you're in otherwise you might
Get a yellow or blue cast on all your Images and if you're not sure if you're Using the right shutter speed ISO or Aperture the easiest thing to do is at The bottom of your camera screen you'll See mm this is your light meter and next To it you'll usually see a number that's Like negative two plus one this Basically tells you how too bright or Too dark you are if there's a negative Number it's too dark there's a positive Number it's too bright for the zv10 you Either want to make sure it's right at Zero or it's at plus one anything above That your image will be too bright Everything below zero your image will be Too dark this is going to help you make Sure you always have properly exposed Images now if you want to get great Photos and videos you want to make sure Your autofocus is set up properly Otherwise it's going to be a struggle to Use this camera now this is done with Two different settings in your function Menu once you hit your function menu you Want to go over to focus mode or Focus Area now once you go into Focus area There's three different options wide Zone and flexible spot for most people I Recommend using wide because it lets the Autofocus look at your entire image area And figure out what needs to be in Focus Or there is Zone this basically chooses A specific Zone in your image area you
Can choose once you click into it you Can choose the middle Left Right top and This is for specific shooting scenarios Where you know your subject's either Going to be in the top left top right And this will be the autofocus is just Focusing on that area and lastly you Have flexible spot this is to make sure That whatever you're focusing on is Inside of this little square you can Move it anywhere in the image area but This way it's just focusing on that Small box for most people I do recommend Using wide next up is focus mode and This is really specific to whether You're shooting photos or videos once You go into Focus mode you'll see single Shot AF automatic AF and then continuous AF if you're in photo mode and you know You're looking at something that's just Sitting in one place single shot AF Basically catches focus on something Takes a shot and it does not move Focus Until you hit the shutter button again But for most people I actually recommend Shooting an automatic AF in photo mode This will make sure that even if your Subject is moving if the camera is Moving it will basically track Focus as The camera or subject moves but if You're in video mode the only option you Really have is continuous AF this is for Moving subjects even if they're sitting Still this is really the option to use
And below that you have DMF and manual Focus which I don't recommend using if You're going to spend so much money on a Camera like this I recommend using the Automatic modes all right let's get into The fun stuff how do you get the best Colors from your zv10 well there's two Different ways to do this and they're Different for both photos and videos if You want great colors in photo mode what You want to do is you want to go into Function menu go down to right here Creative style and this will give you a Bunch of options like portrait Vivid Standard does not look very good but I Recommend portrait because it seems to Have the best colors it brightens up Your image a little bit so it doesn't Feel as dark for 99 of people I either Recommend using portrait or a landscape Everything else is just okay Sunset has Like a weird yellow cast to it I don't Really recommend it there's also black And white in sepia which has like an Old-timey look to it but again for most People portraits and Landscape is going To give you the best colors and also It's going to make your photos and Videos look the best but if you're Shooting photos and you're someone that Likes to edit photos I'm going to show You a setting later in this video that Lets you get the most data from your Photos so that you have them the most
Room when it comes to editing now for Videos it's a little bit more Complicated because some people just Want great videos out of the camera and Some people like to have as much room to Play around with the colors later on so For you you can either use a creative Style or you can turn off creative style Go to standard go back into the function Menu go into picture profile and this is Going to give you 10 different options It doesn't really matter which one you Pick just pick your favorite number go Into that picture profile and there's Two picture profiles that I recommend Using one is cine4 this is going to give You very filmic color so you want to go Into gamma pick cine 4 go down to color Mode and make sure you pick Cinema if You're using cine4 or if you want a Maximum flexibility with your colors and You want to make this video make your Videos into something cinematic go into Gamma go down to s-log 3 you want to Make sure you use s-log 3 And then go to color and you want to go Down to S Gamut3. cine this is going to give you The best colors and this way you're Going to get the most room to play Around with your colors later on one Setting that I highly recommend turning Off is soft skin effect this is turned On by default but it simply looks bad on
Everybody so for this you'll want to go Into menu make sure you're in tab one And it's the third last page as you can See on the screen go into soft skin and You want to make sure this is off by Default it's set to Mid or high but you Want to make sure it's off and this way You'll get the best looking skin so in Order to get the best quality photos and Videos it's more than just what color Mode you're shooting in you also want to Make sure you pick the right file type And this is different for both photos And video so assuming you're in photo Mode you want to go into menu and on the Very first page you'll see file format You want to click into this and you have A few options raw raw plus JPEG and jpeg If you're someone that's just a casual User you want to get great photos in Camera just simply shoot jpegs and those Are the photos that you will post or do Whatever you want with but if you're a Power user like me I recommend shooting Neither raw or raw plus jpeg raw plus Jpeg is useful because when you're Looking at your photos on your computer You have a JPEG right next to every Single raw photo so you know exactly What that photo is before you open up in Whatever program you use so let's assume We're going to draw plus JPEG and you Want to go down to jpeg quality and you Also want to make sure you pick extra
Fine for jpegs this way you're going to Get the best quality jpegs and there's Also the aspect ratio that you shoot in Now this is really important if you're Someone that already knows they're going To be posting this on Instagram you can Actually pick 4×3 which is square 3×2 Which is the entire sensor 16×9 which is The widescreen TV ratio that you see Here or one by one which is a one by one Square this way you can set your camera Up for the exact format you're going to Be posting in and depending on what You're shooting you also want to make Sure you pick the right right frame rate Now the zv10 does shoot at 10 frames per Second but you don't have to use the Maximum 10 frames per second otherwise You're just getting a bunch of photos That you don't really need so to change The setting from your main screen hit The left button on your scroll wheel and You'll have a bunch of settings come up The main one to look out for a single Shooting where it just takes one photo And then stops then there's continuous Shooting where it keeps taking photos as Long as the shutter button is pressed Down and for this you can pick different Modes where at high you'll get 10 frames Per second At Mid you'll get about five or six and At low you're getting about two or three Frames per second so depending on how
Many photos you want how fast your Subject to moving you can pick different Frame rates if you're a casual user that Really doesn't know how to use this Camera yet I recommend simply shooting In high mode this way you get every Photo you need and as you get better With this camera you can pick what frame Rate to shoot at next up let's talk About how to set up your video properly For this you want to go into menu and You want to scroll over to the second Tab and down here you'll see a bunch of Options one thing to make sure is you Want to make sure your shoot mode is set To manual exposure and then you want to Go into file format now for this you Have two options one is xavcs 4K and one Is xavc shd 4K gives you 4K and HD Simply gives you full HD resolution Depending on what you're shooting and What you want you'll get different frame Rates and different options in each Let's first take a look at 4K so once You go into 4K mode right below that You'll see record settings and here You'll see different frame rates you can Shoot at 30 frames per second or 24 Frames per second so depending on how Good you want the quality to be so you Can pick 30p at 100 megabits per second Or 60 megabits per second for most People I simply recommend shooting at The highest 100 megabits per second
Because you're really not going to save That much space and you want to make Sure you get the most out of this camera So for this reason I recommend shooting In either 30p 100 megabits per second or 24p 100 megabits per second and for this Example we'll go with 24p next up let's Take a look at HD so inside of HD you'll See a bunch of different options as well Now you have a lot more frame rates you Have 30p you have 24p but you also have 120 frames per second for five times Slow motion and 60 frames per second for Two times slow motion this is where it Records that frame rate in camera now This has two options one you can simply Record it 60 frames per second to get Really smooth motion motion blur or Really smooth movement in camera this is Really good to have smooth motion for Like sports or any kind of uh thing Where you want your audience to be Really immersed in the content you can Also use it for slow motion by slowing It down later however this camera does Have a slow motion mode that I will show You in just a second but go ahead and Pick whatever frame rate you want Depending on what you're shooting if You're shooting something cinematic I Recommend sticking with 24p because That's the frame rate movies are shot in Next up let's talk about slow motion Because that's really important on this
Camera for this you'll want to go back To the top of our camera Hit this button go into slow motion mode And once we go back into menus you want To go down to slow s and Q setting and For this you have two options record Setting and frame rate so for this you Want to set your record setting to as Low as possible we'll go with 24p And then your frame rate to either 120 Frames per second or 120p and what this Does is it slows down the footage in Camera this way you don't have to take It into an editing software and slow it Down later on this is really good for Someone that doesn't want to edit their Footage and just want slow motion in Camera to show people so for this you Want to pick the highest frame rate Which is 120 or 60 frames per second Pick that and now whatever you shoot Will already be slowed down in camera But there's one really interesting trick With this camera is that if you go to a Lower frame rate than your recording Frame rate like let's say eight frames Per second or four frames per second Which you'll actually notice at the Bottom it now says six times quick Motion what this allows you to do is it Simply allows you to almost shoot a time Lapse or a hyperlapse in video where it Shoots at a slower frame rate than your Record frame rate so when you play back
The video everything will look sped up This is really good if you want to take The camera move through a space for a Hyperlapse or a time lapse this is a Really convenient way to do it and There's also a way to shoot time lapses Or interval shooting in photo mode so Set your camera to photo mode go back Into menu and here you'll see interval Shooting mode on the first tab on the Third page once you click into that You'll see a couple of options but you Want to make sure interval shooting mode Is on then shooting start time one Second shooting interval where basically It picks how much of a pause it takes Between taking photos so we'll set it to Like let's say five six seconds and then You want to set number of shots and you Want to actually pick the highest number Of shots you can possibly get so we'll Just pick 999 line on everything and This way what it'll basically do is It'll take a photo every six seconds up To 999 photos and this way you can get a Really beautiful time lapse just using Photos the advantage for using photos For time lapses is that this camera does Shoot higher quality photos than videos So this way you can get a much higher Quality time lapse by using Raw photos Now audio is a huge part of using this Camera so to make sure you get the Perfect audio go back into your quick
Function menu go all the way to the left Click into that and you'll see a record Level so for this you basically want to Talk and you'll see levels at the bottom And you want to try to be as loud as Possible like check check check and you Want to make sure whatever you have your Record level set to that it's not too High so that this recording meter Doesn't go into the red in another Setting that's really important is you Want to go back into menu go to the Second tab on the third page and you'll See when noise reduction you want to Make sure you have this on at all times It's not going to affect you if there's No wind noise but just in case you're in A place where there's a lot of Background noise or wind noise it will Cancel that out automatically Now using This camera isn't just about getting the Right settings in it well it's a big Part of it but another thing that's Really important is to make sure you Have the right accessories for this Camera so in order to get the fastest Recording frame rates or the fastest Photo frame rates you want to make sure You have at least a v30 card or a v90 Card actually a v19 might be Overkill But you want to make sure you have at Least a v30 card this way your camera Won't need as much of a break when Shooting photos and you also want to
Pick up a cage for this camera if you're Maybe a content creator or a Professional vlogger this way you'll Have kind of like an armor on this Camera that one it protects the camera But also lets you mount accessories to This camera and more easily lets you put It on a tripod or a gimbal the two cages That I really like I'll leave links in The description down below I really like The cages from small rig and and Telltale and another really important Thing are your batteries because this Camera has such a small battery I Recommend having plenty of spares now if You go on Amazon there's third-party Battery manufacturers that will give you Batteries for like dirt cheap they're Like 20 bucks a battery I actually do Recommend using them they may not last As long as the official Sony batteries But considering how expensive the Sony Batteries are the third-party batteries Are an amazing deal and you can get like Four for like 50 bucks or you can also Use a USB power supply dummy battery Just like I am on this M50 this Basically puts the battery at the bottom Of your camera and it lets you run a Power cord to your power outlet so that Way you have a just power to your camera At all times this is really useful if You're someone like me that records Videos for YouTube or any other platform
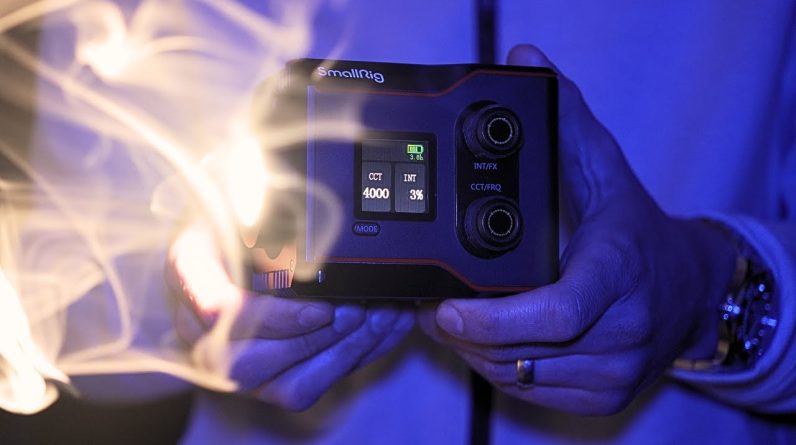
Where you're sitting down a lot and you Don't want to have to worry about Running out of battery if you're a Content creator that's making content With your zv10 I also recommend having a Small light you can find a cheap RGB Light on Amazon this is a random light That I found for 40 bucks but the one That I recommend most people get is the Aputure MC light it's really small but Very very powerful it's about 120 Dollars but it's probably the best Pocket let you can get with all these Settings dialed in you will without a Doubt get amazing photos and videos for Whatever you're shooting and if you want The best price on the zv10 or the Accessories I talked about today make Sure to check out the links in the Description down below and I will see You guys in the next video peace

